
Album "My Angel - Twelfth month" (Tutorial)
Fils & Papiers
marzo 22, 2020
18 Comments
Hello everyone!
Today and after a lot of work and problems I present to you an very special baby album.

This is the album where I'm going to keep the most emblematic photos
of the first 12 months of my first baby.
As a first-time mother I'm very excited about this project and I hope you like it as much as I do.
As a first-time mother I'm very excited about this project and I hope you like it as much as I do.
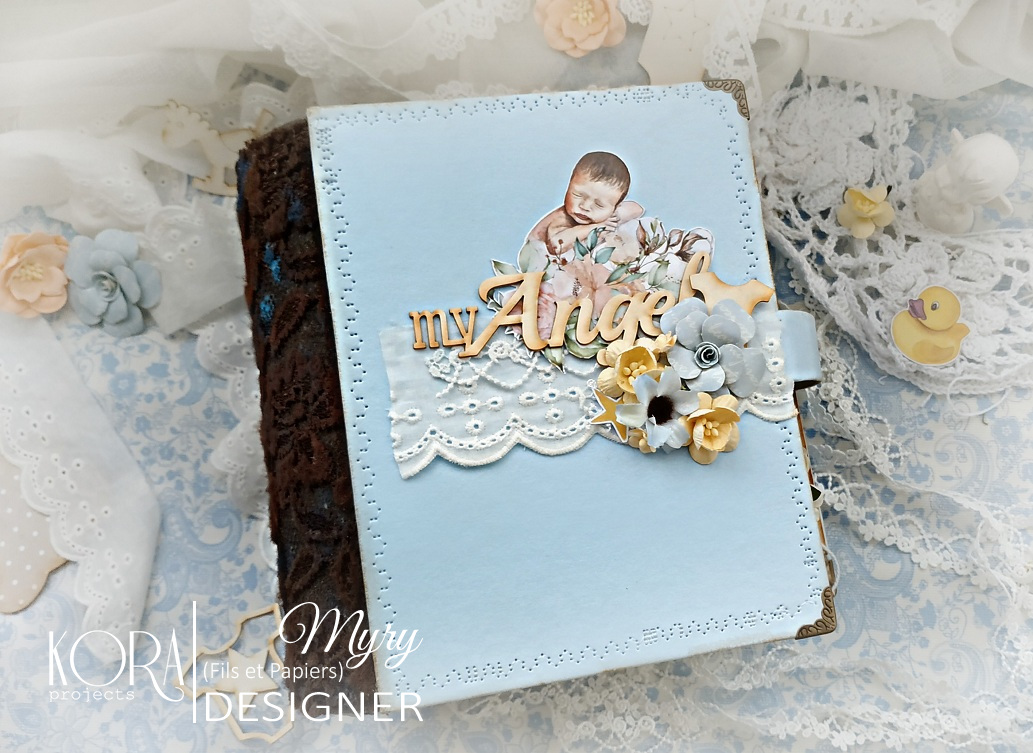
For the cover I used soft blue ecoleather and a little piece of trim...

and for the spine, brown fabric than I painted with blue acrilic paint and this beautiful brown lace.


I made an "outdoor" binding. You can see how I did it in the tutorial.


-KORA PROJECTS"Sweetie Baby" paper collection
-kraft cardstock 300 gsm/110 lb
-kraft cardstock 300 gsm/110 lb
-cardboard of 1.5mm
-KORA PROJECTS Ecoleather mate "Caribbean Blue"
-KORA PROJECTS Ephemera "Sweetie Baby - Teddy bear"
-KORA PROJECTS Chipboards: "my Angel", "Party bears", "Boy onesie", "Baby carriage", "Boy toys", "Mobile stars", "Sleeping bear", "Set My baby", "Chapas 12 meses" and "Bears playing"
-FREETANY FLOWERS: 48 Little boy-2, 49 Музыка любви, 50 Мальчуковый, 28 Little boy Набор цветов and 19 Amore Набор цветов
-Tools for cutting, folding, gluing and inking the edges, sewing machine, tracing paper, magnets, eyelets and crop-a-dile, adhesive paper tape, metal corners and some embellishments.
-KORA PROJECTS Ecoleather mate "Caribbean Blue"
-KORA PROJECTS Ephemera "Sweetie Baby - Teddy bear"
-KORA PROJECTS Chipboards: "my Angel", "Party bears", "Boy onesie", "Baby carriage", "Boy toys", "Mobile stars", "Sleeping bear", "Set My baby", "Chapas 12 meses" and "Bears playing"
-FREETANY FLOWERS: 48 Little boy-2, 49 Музыка любви, 50 Мальчуковый, 28 Little boy Набор цветов and 19 Amore Набор цветов
-Tools for cutting, folding, gluing and inking the edges, sewing machine, tracing paper, magnets, eyelets and crop-a-dile, adhesive paper tape, metal corners and some embellishments.
You can see the tutorial on Kora Projects Youtube channel.
With this album I participate in the following challenges:


МАРТ


OE "цветы"

нужно сделать любую скрапработу с мягкой тканевой основой
With this album I participate in the following challenges:
МАРТ
OE "цветы"
нужно сделать любую скрапработу с мягкой тканевой основой


